
Here we are in the 4th quarter of high school. SPRING is in the air, along with love, proms, and Grad Bash for Seniors. In Florida, students are thinking about their first day at the beach. But, teachers know
- Students need to stay focused
- Standardized testing is underway, and
- AP Exams are right around the corner
In his book, How the Brain Learns, David Sousa claims that by increasing the amount of oxygen in the blood through physical movement, we can enhance memory and learning.
Over the years, I have tried many different approaches to keep students moving, engaged and involved. The majority of your students will love to move and mingle, as a change of pace. If you’ve never braved a group activity or don’t know where to start, let me share some of my “faves” with you!
1. SORT and MATCH CARDS
This activity is a great way to reinforce the Rule of Four Principle for mathematical understanding. I lovingly call this the “G.N.A.W. Approach”. The Rule of Four helps students to use multiple representations of mathematical concepts, namely Graphic, Numeric, Algebraic, and Words (verbal).
How to Create your own Sort and Match Cards:
- Find a set of 10-16 questions.
- Create 3-4 categories for each problem. GRAPH, EQUATION, CHARACTERISTIC, KEY FEATURES, TABLES, OPERATIONS, etc.
- Place each category on a different color card and number the cards.
- Create a separate set for each group of students and place them inside a zipped bag.
- Provide a recording sheet for each group.
Here is a sample of my Algebra 2 Honors Polynomial Sort and Match Activity from my Teachers Pay Teachers Store.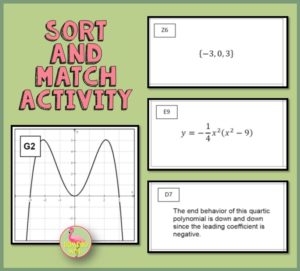
THE “UPS and DOWNS” OF SORT and MATCH CARDS
On group work days, you will get the opportunity to hear the thinking processes of your students. The graph cards can be later separated by categories and placed in an independent station for extension. The equation cards can be used for independent algebraic practice. The downside is the time and cost of materials to create the card sets, lost cards, and possible storage issues.
2. STATION ACTIVITIES
I love to use a station activity for reinforcing application problems at the end of a unit. Students can never get enough practice discussing and practicing what they define as “the hard problems.” Placing students in cooperative groups gives them confidence to express their ideas and develop problem solving techniques in a safe environment.
How to Create your own Station Activities:
- Find about 8-12 application problems for a unit of study.
- If you know your students well, write unique questions that bring your students into the problem. It makes a difficult task become fun and personally challenging.
- Place the questions in a protective sleeve or laminate for durability.
- Create a student answer sheet, for accountability.
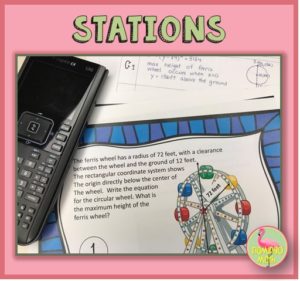 Here is a sample of my PreCalculus Conics in the “Real World” Activity from my Teachers Pay Teachers Store.
THE “UPS and DOWNS” OF STATION ACTIVITIES
Having a set of application questions that require reading and gathering information will help students discuss the problem and determine what data is important. Students are accountable for their own work if you provide them a recording sheet. You can provide a variety of rigor and difficulty throughout the question set. Group collaboration and reteaching will help your struggling students gain proficiency as you circulate around the room. Calculators can be provided at a specific station to keep students focused when the work requires technology.
The downside of stations, from my experience, is that the weaker students may be tempted to copy work from other group members. Also, if you collect the recording sheet, finding time to grade each paper can become a time-intensive task. One thing I have done is to grade one or two questions from each member of the group and everyone shares the common grade.
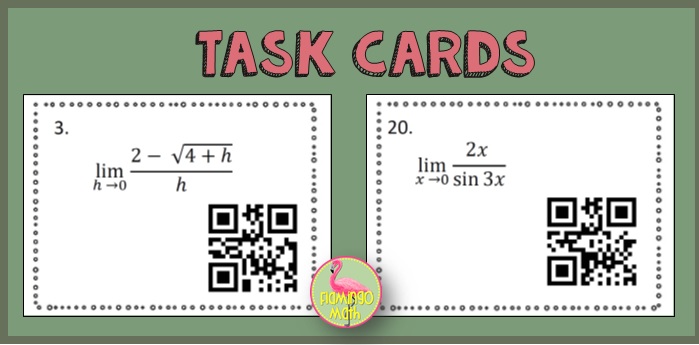
3. TASK CARDS WITH QR CODES
Finally, I love Task Cards! They are a great way to practice algebraic and operational skills. Plus, students love to use their phones in class. Having a QR Code added to a task card prompt provides instant feedback and can help students evaluate where they are struggling and succeeding.
How to Create your own Task Cards with QR Codes:
- Choose 12-24 questions that can be worked in 2-5 minutes each.
- Create a QR Code for the answer, or maybe just a hint, or a link to a video with a QR Code Generator.
- Number the cards, copy, cut, and laminate a set of cards for each group.
- Provide white boards and markers for student work.
Here is a sample of my Calculus Limits Task Cards with QR Codes from my Teachers Pay Teachers Store.
THE “UPS and DOWNS” of TASK CARDS with QR CODES
The best part about Task Cards with a QR Code is that they are self-checking. Your students can work on the card sets independently if you store them in a convenient location. By providing an answer, hint, or video link on the card, students can oftentimes help themselves and work backwards. The biggest downside to QR Codes is the time it takes to create each card. Also, the QR Codes are only alpha-numeric. If you wanted to include a picture or graph, you need a permanent location online to store those images. And again, materials cost, time to create, and storage can become a problem.
These are 3 of my FAVORITE GO-TO STRATEGIES I have used with students. There are so many great ways to collaborate in the high school classroom and get your students up and moving about. What are your favorite strategies?